righto! heres how to add steering wheel volume controls to your i30, if you were unfortunate enough not to get them from the factory!
parts you will need
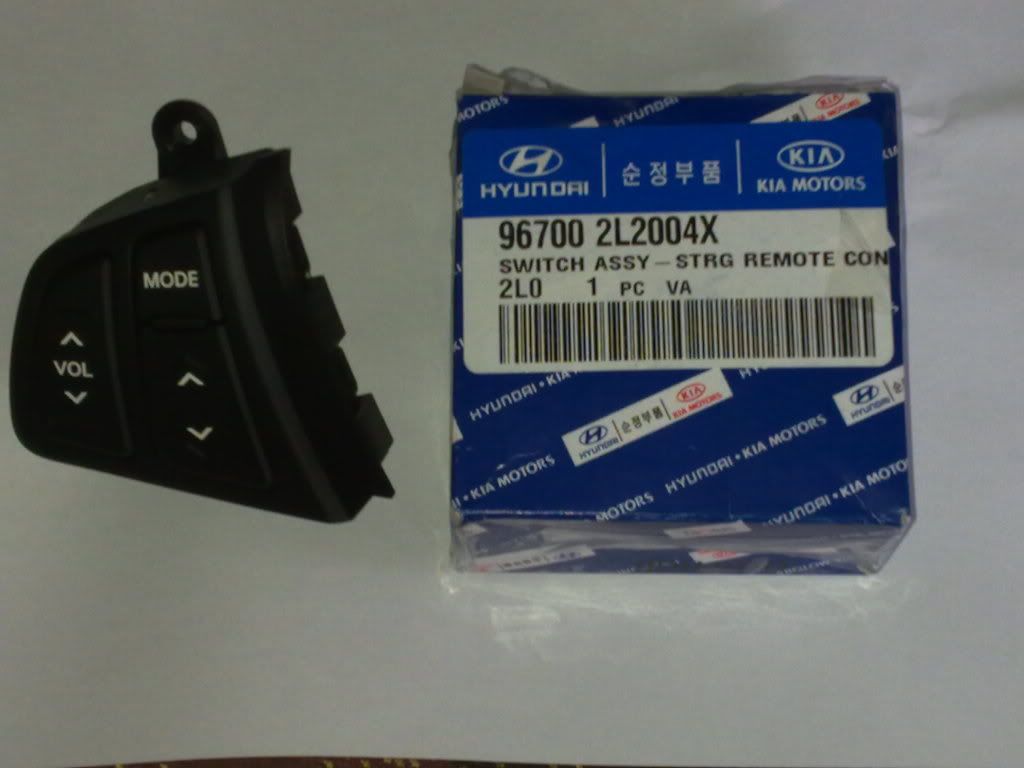
1 - steering wheel volume switch
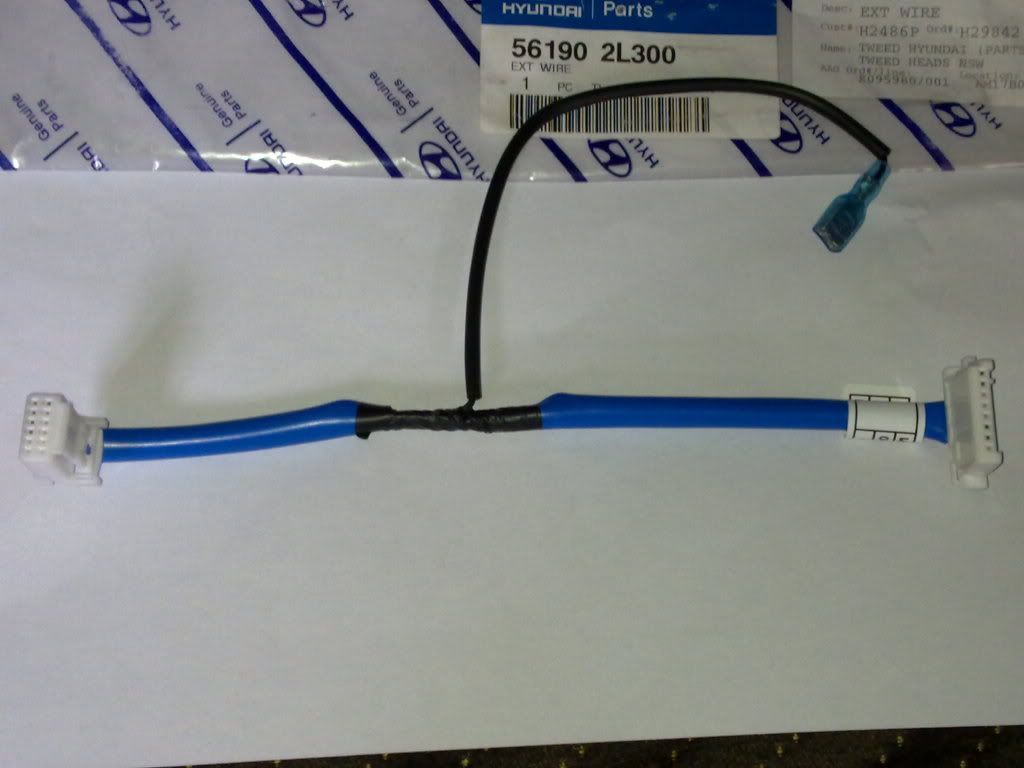
2 - wiring loom
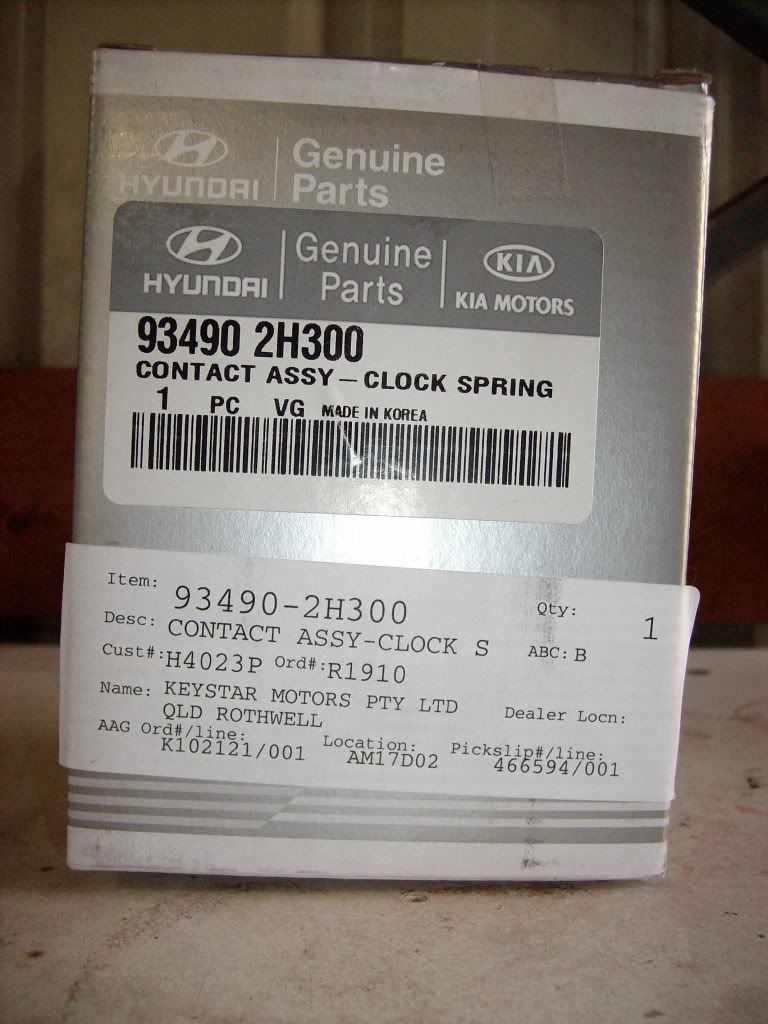
3 - possibly a new clock spring, i will explain how to tell if you need a clock spring or not just after the photos of the parts!
1 - switch, the one sold here by hyundai doesnt come in a box, it just comes in a packet!
2 - loom
3 possible clock spring
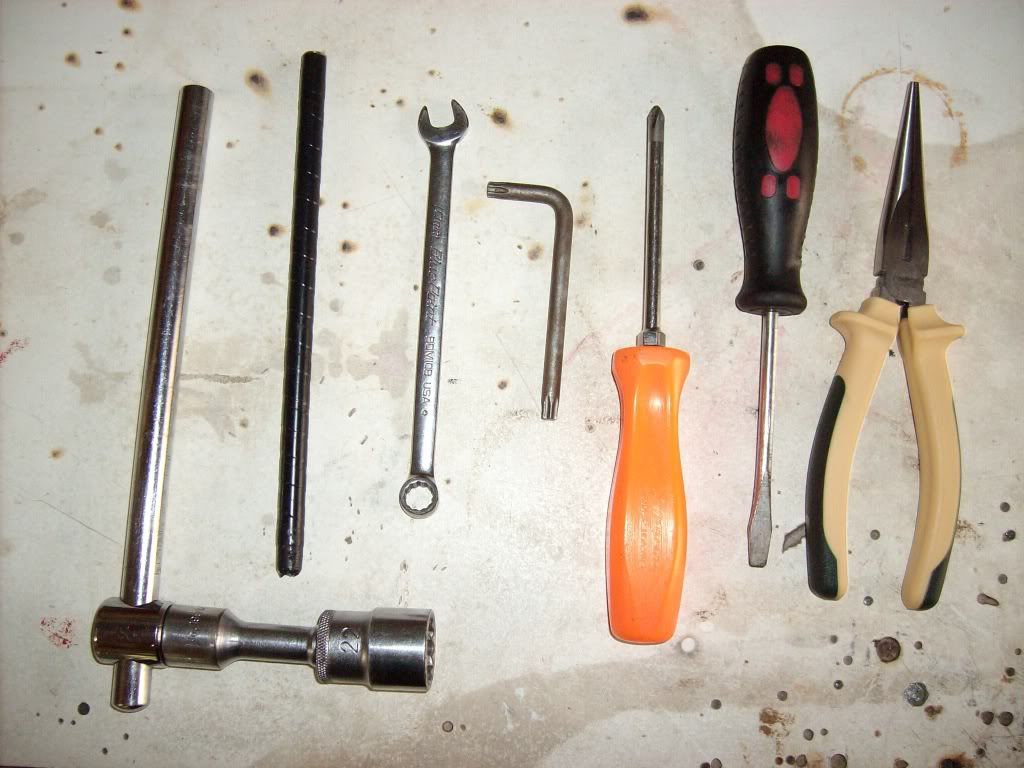
tools you will need, from left to right
1 - breaker bar, extension and 22mm socket
2 - my special allen/torx/tamper proof extension bar
3 - 10 mm spanner
4 - T40 torx driver (you need the extension bar because you will be putting the long side in to the wheel)
5 - phillips head screw driver
6 - flat blade screw driver
7 - long nose pliers (optional)
before you start anything/go to hyundai and order parts/go to ebay and order parts etc etc please for the love of god do this... this simple 5 minute job will let you know if you need a new clock spring! you need to assess what clock spring you have, and if the wires to the radio are there!
an easy way to do this so you can order all the parts at once is to pull the steering coloum shroud off! its a simple process that will take you about 15 minutes all up!
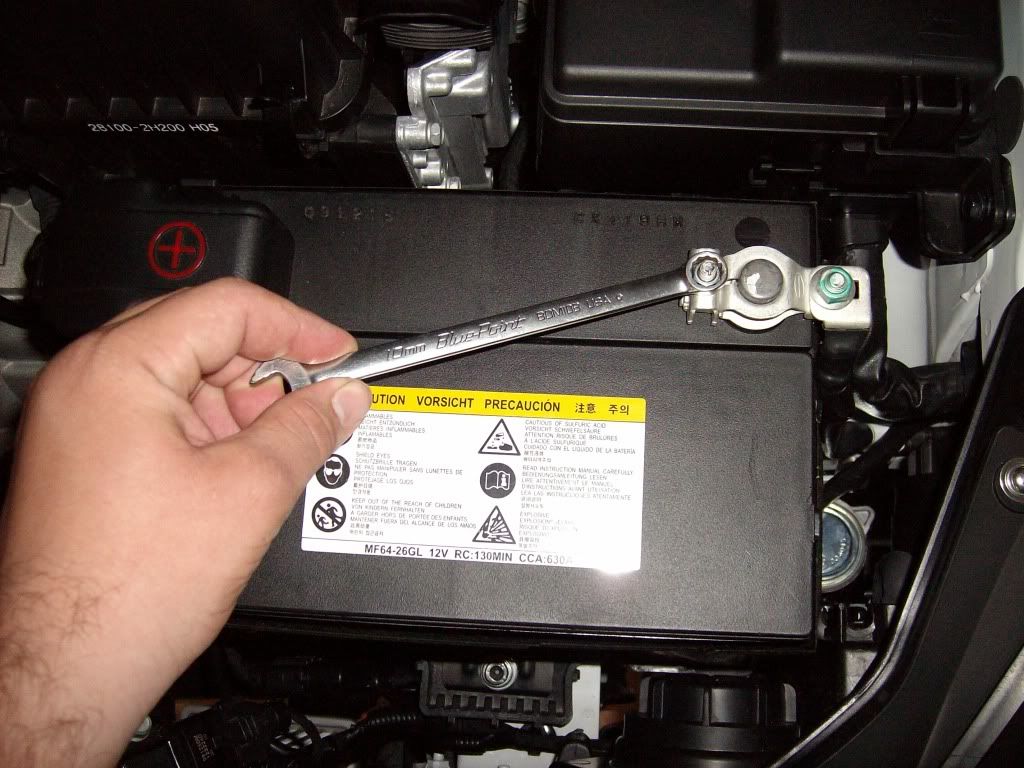
!!!disconnect the battery, you only need to remove the -tive. then press the brake pedal to remove any residual current!!!
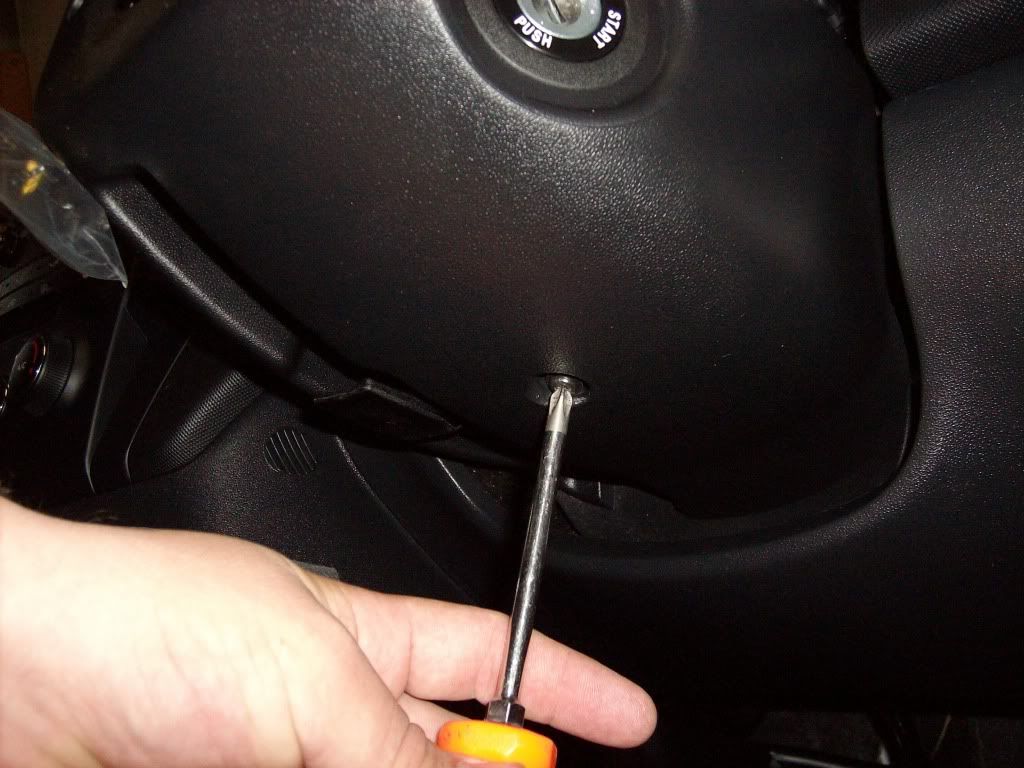
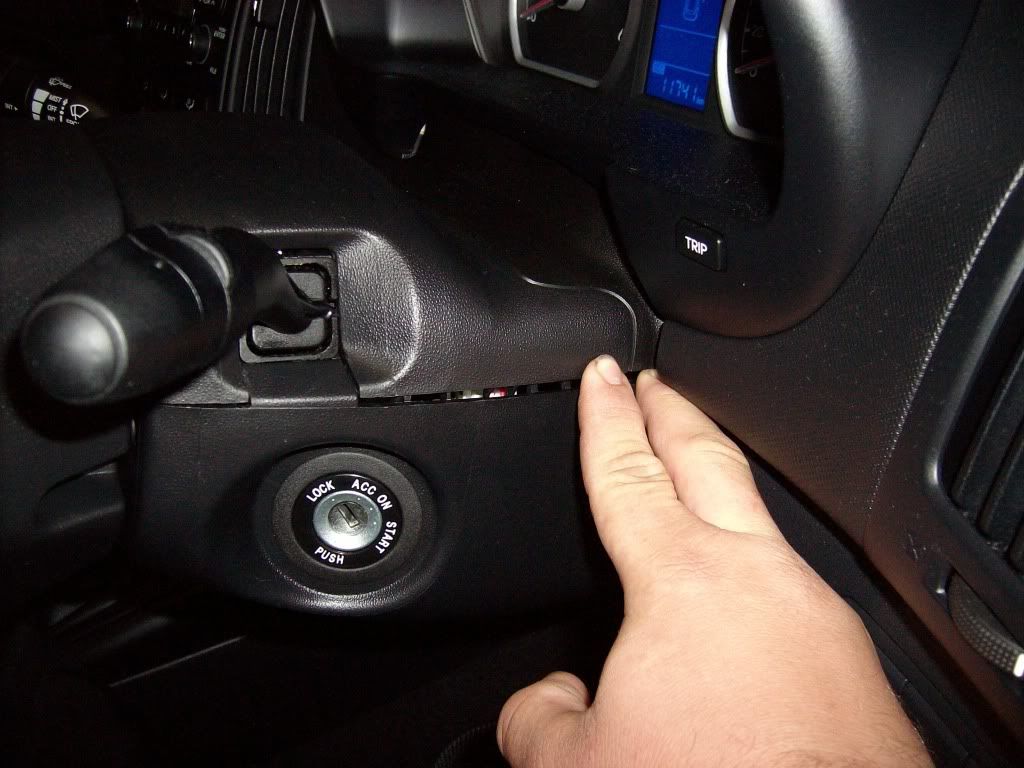
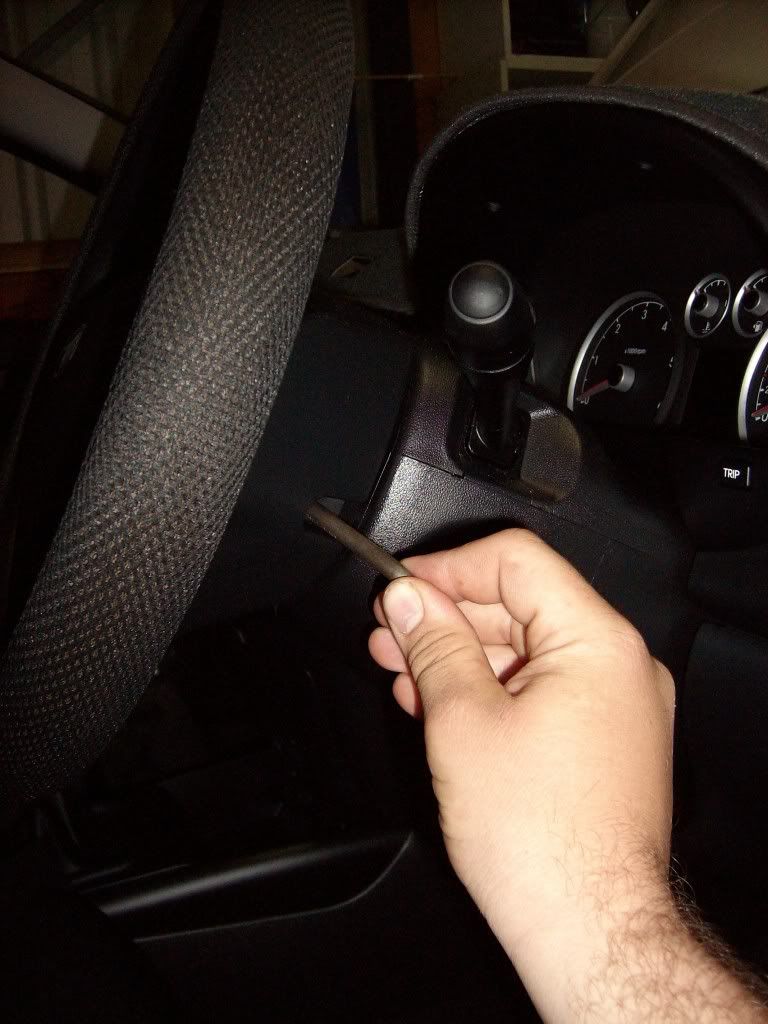
1 - remove screw under the steering coloum
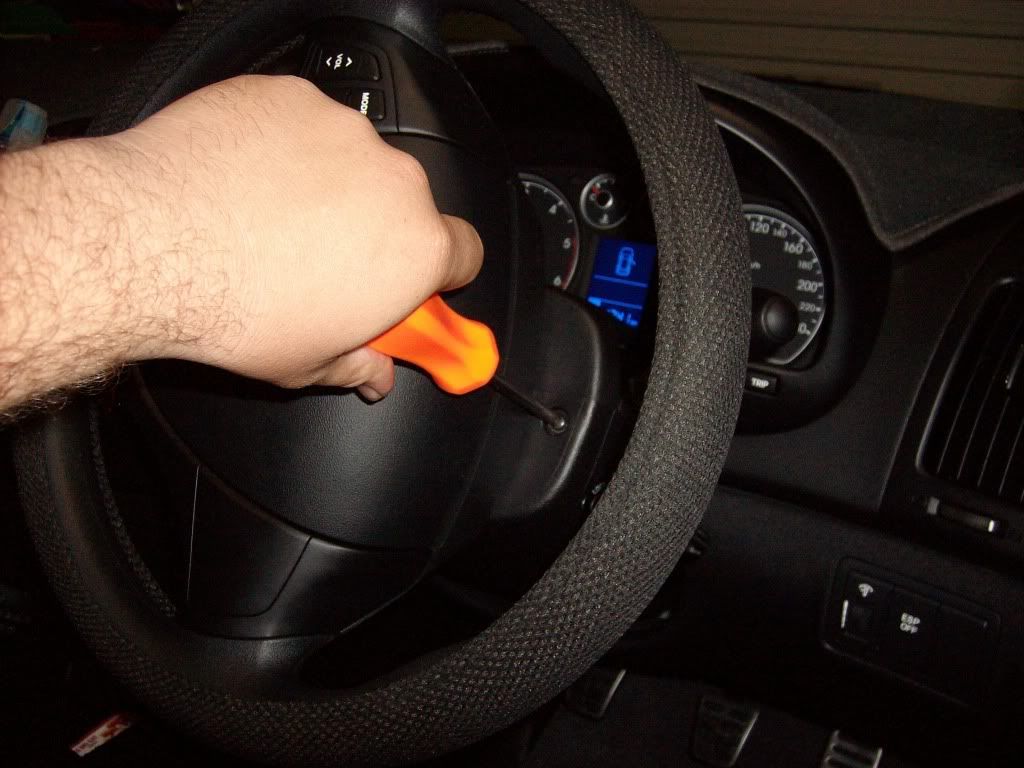
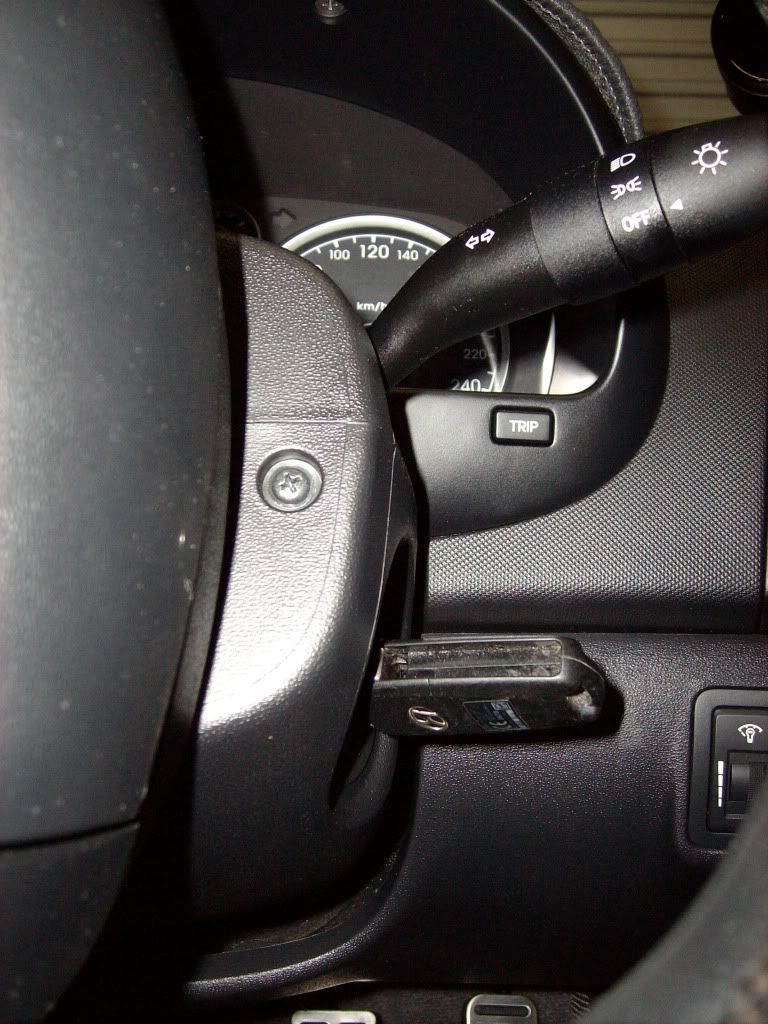
2 - turn the wheel 90 degrees and remove this screw, there is one on the other side so you will have to turn the wheel 180 degrees to get to it.
3 - closer inspection
now you have the screws out you can remove the shroud
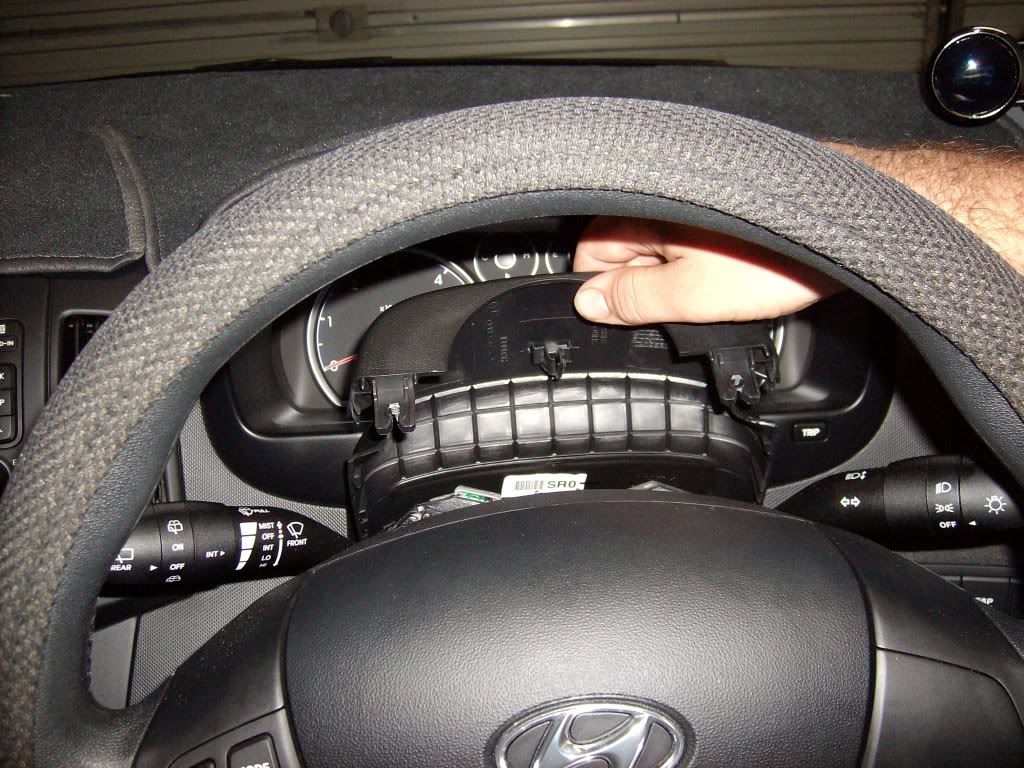
4 - push the top part in and try and keep the bottom half where it is, you will hear the clips undo do both sides like this
5 - lift the top half up and out when the steering column is in the lowest and furthest out position it can go to, unlock it and pull it out and down (see section 4 page 28 of the owners manual for directions on steering column movement)
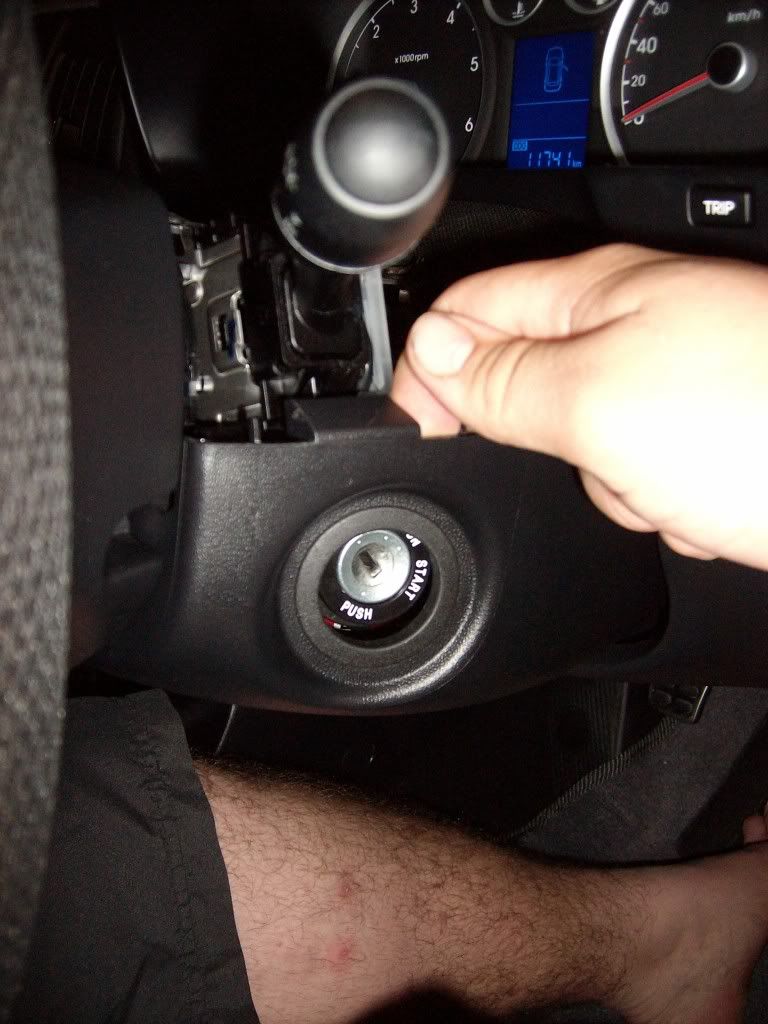
6 - remove the botton half, pull it over the ignition barrel then slip it down, it helps to move the column up as far as it will go and leave the locking lever just so it stops it from moving, but not right in! you will see what i mean when you come to remove it
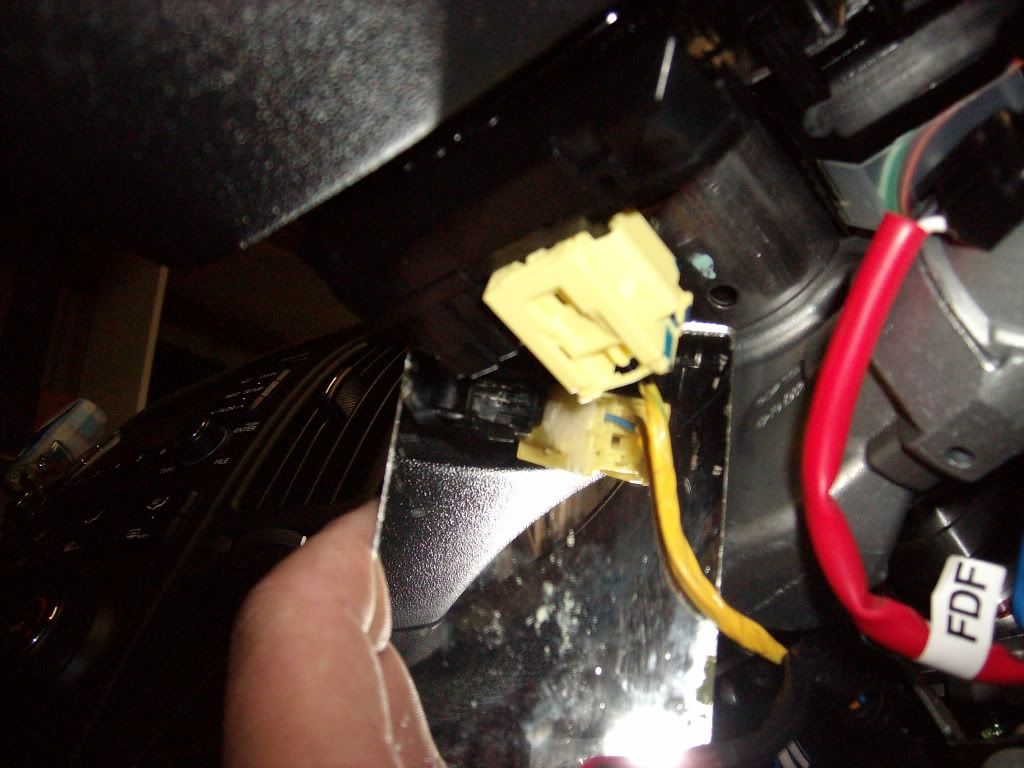
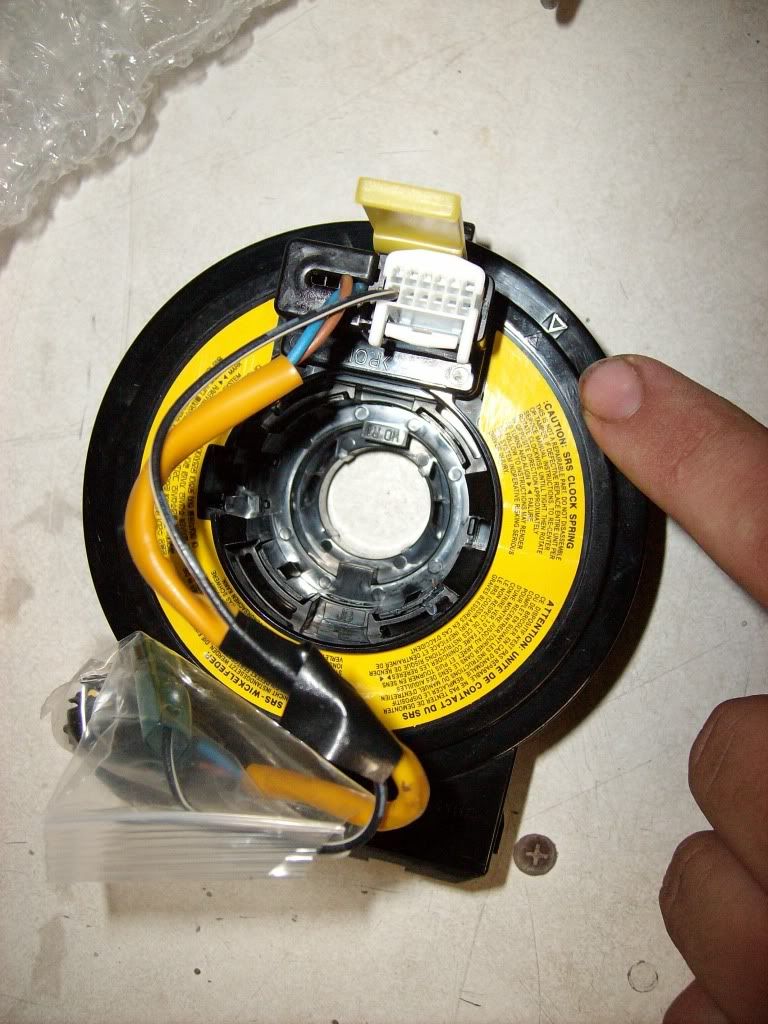
7 - locate on the bottom of the steering column, the clock spring and the connector/wiring for the radio controls
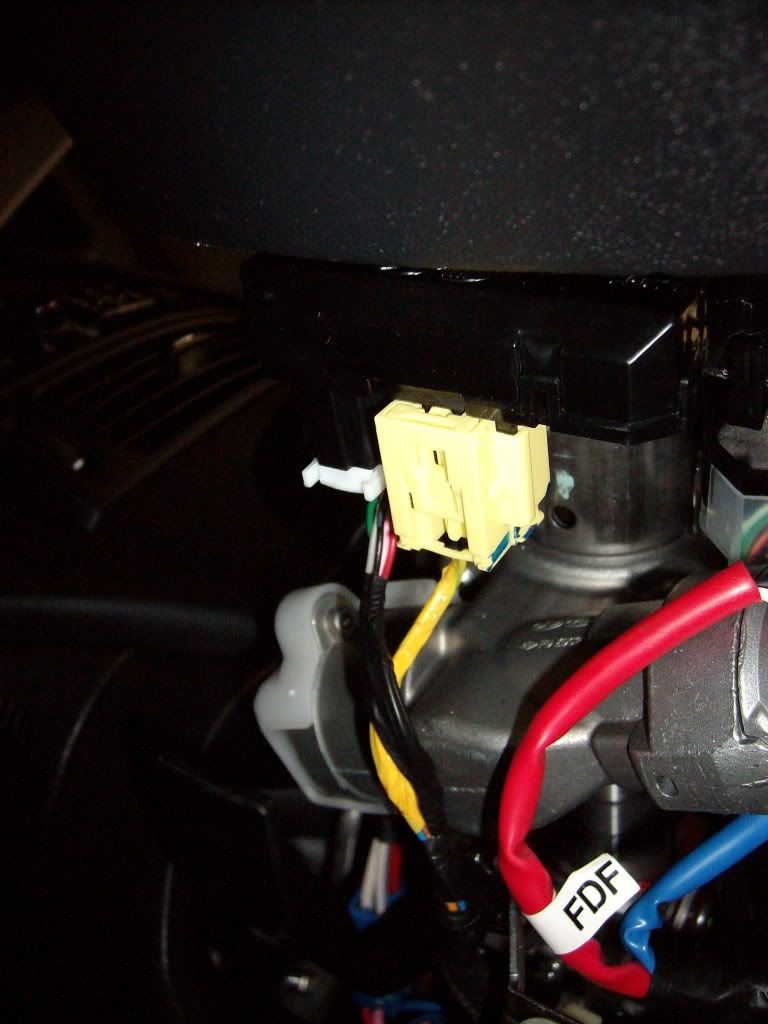
8 - the wiring you need to have for this to work

now for the part that will tell you if you have the correct clock spring, or if you are ordering a new one
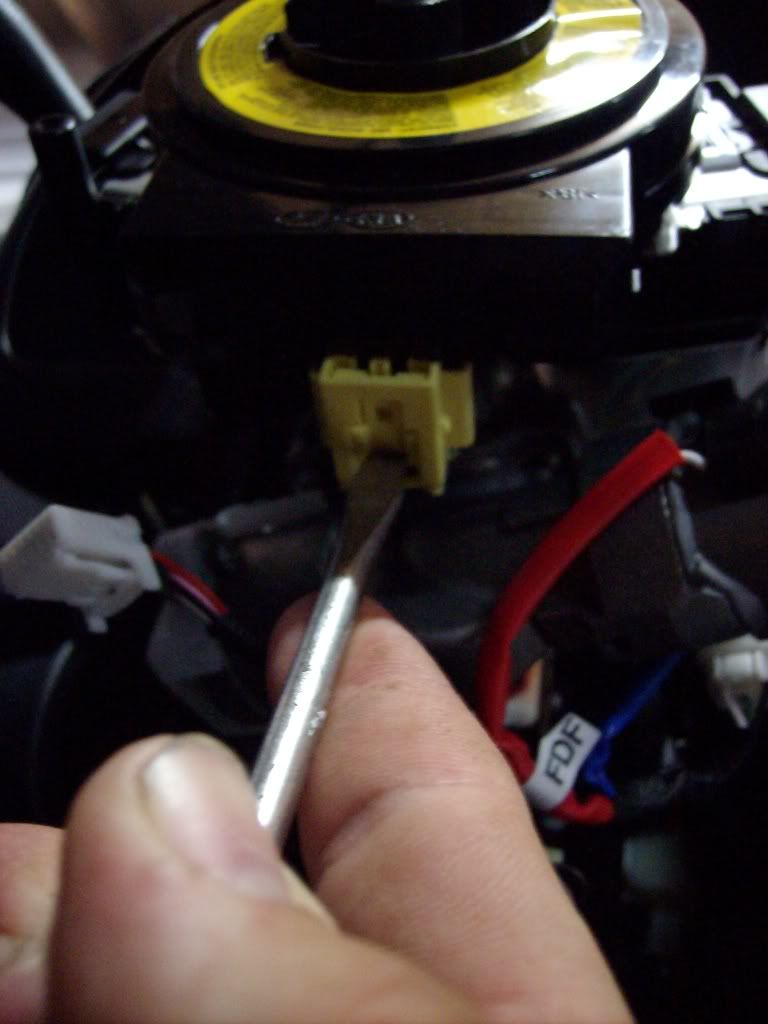
9 - remove the WHITE connector like so use your thumb to push on the tab then pull the connector out
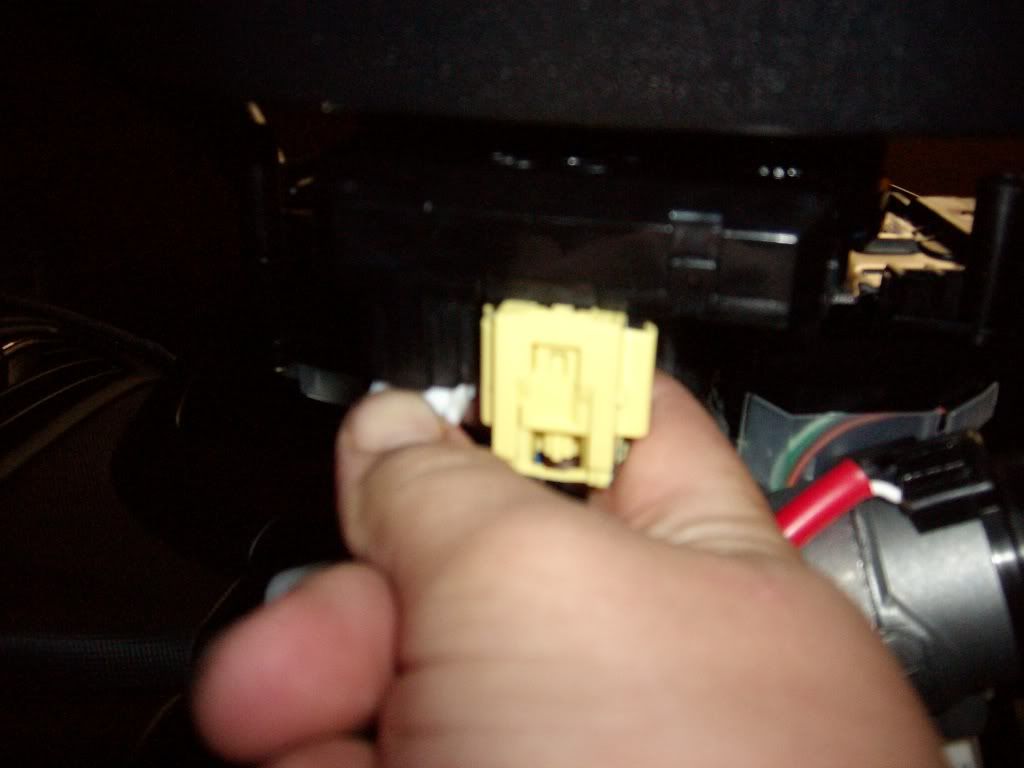
10 - grab your favourite small mirror and look up the plug and see how many pins are in there, it should look like the one in the pic, if you only have the bottom row, then you need a new clock spring!
to put it all back it's the reverse of removing everything, double check all connections and make sure the wiring won't interfere/rub on things after you have put everything back reconnect the battery!
check everything works before driving the car!
if everything is good, and you have the loom there, the right clock spring and the parts, then you can get along with the install
this is where we will be removing the air bag, i just want to take the time to say this, i know its not going to happen unless you get something VERY wrong, but air bags aren't really a toy, be careful and remember you're doing it at your own risk... all air bag/SRS wiring is YELLOW!!! and the connectors are VERY hard to remove they are designed to be difficult to remove so they dont fall out, as peoples lives are at risk when that happens!!
right now you know the dangers and what to look for lets start stripping your i30
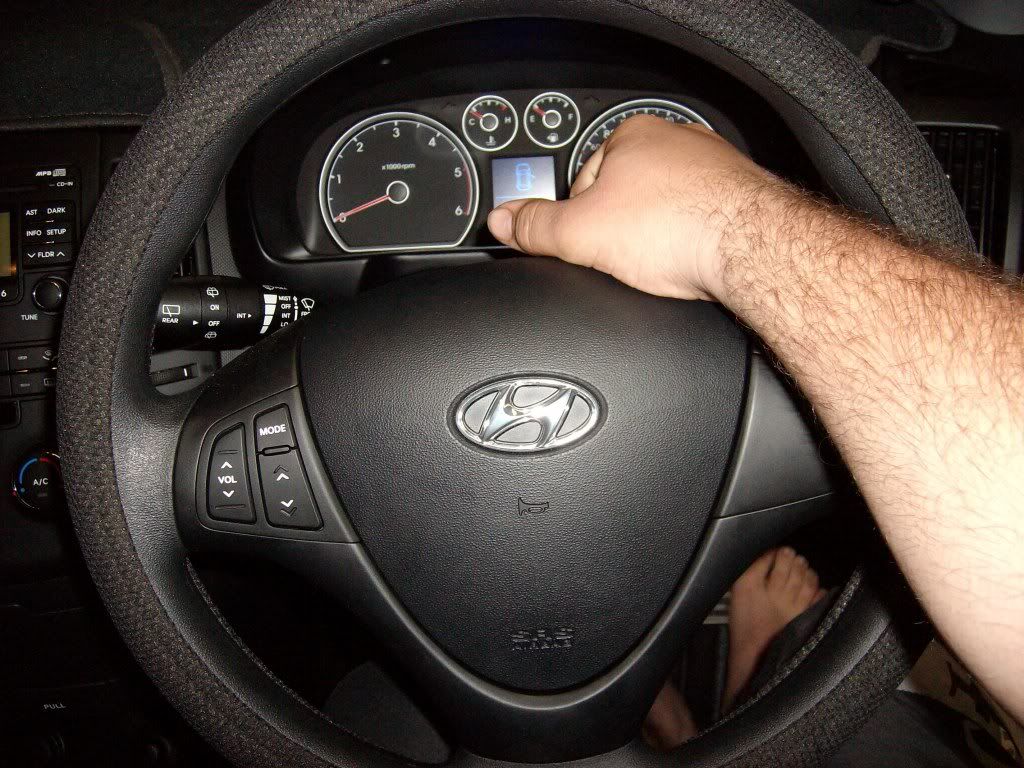
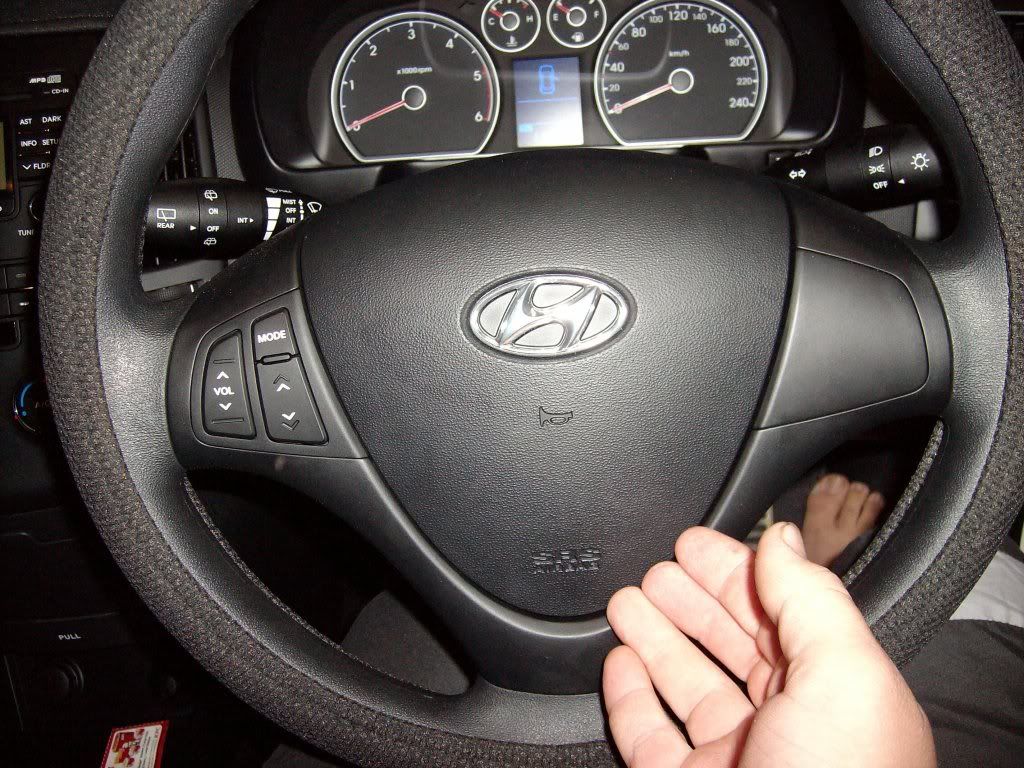
put the steering wheel in the straight ahead position, this is critical make sure the weels are DEAD STRAIGHT and so is the steering wheel, visually check both before you begin!
!!!disconnect the battery, you only need to remove the -ve. then press the brake pedal to remove any residual current!!!
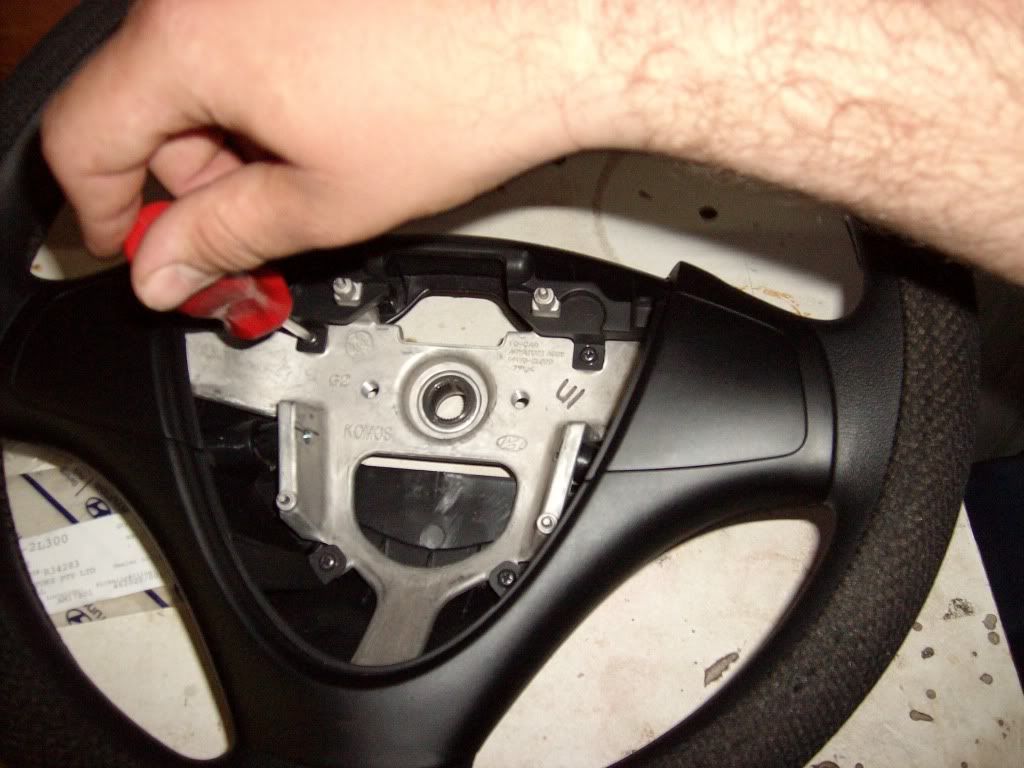
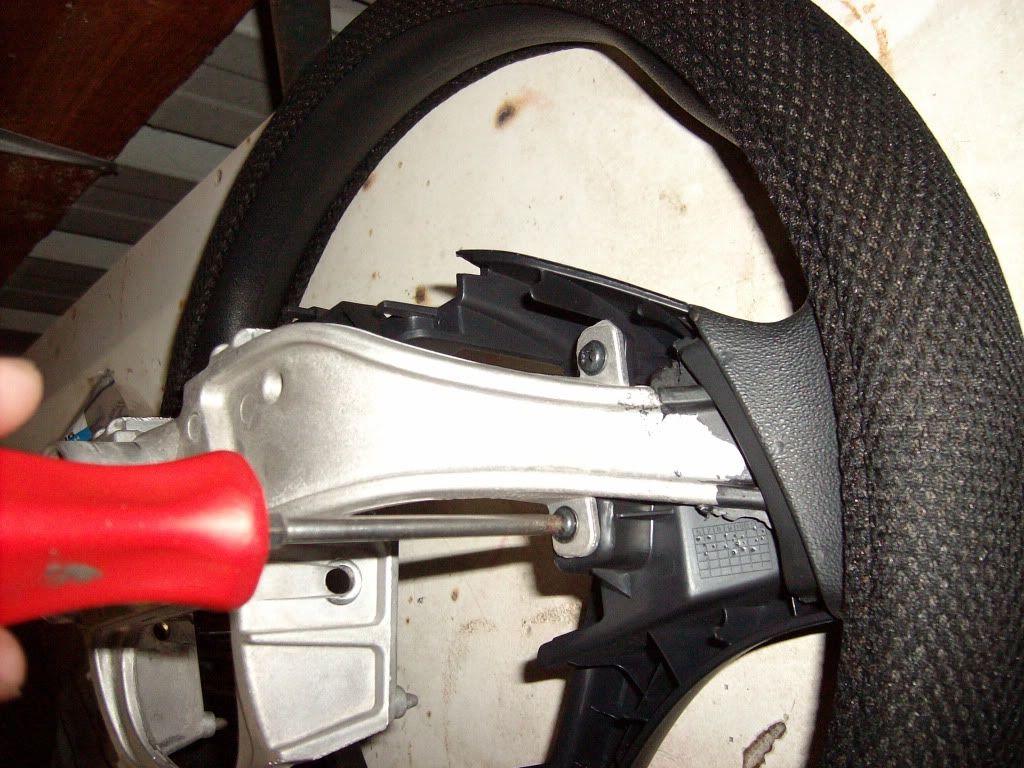
12 - use the T40 torx bit to get at the 2 screws holding the air bag in, there is one each side of the steering wheel!
13 -grab the air bag unit like so and pull it out, it may be tight because the bolts have tapers on the end and i found that they would interfere a little, a wiggle helped to get it loose
one hand top
one hand bottom
14- now you have the air bag out, you will find it has limited movement, undo this clip to give you more room to move the airbag unit, I took the wiring out to get this photo, but the wiring runs in it!
!!!disconnect the battery, you only need to remove the -ve. then press the brake pedal to remove any residual current!!!
15 -next removing the air bag, firstly disconnect the air bag wiring, on the back of the unit there is a black connector with a yellow clip arrangemnt lift the clip up like so (obviously I've removed the air bag for ease of illustration)
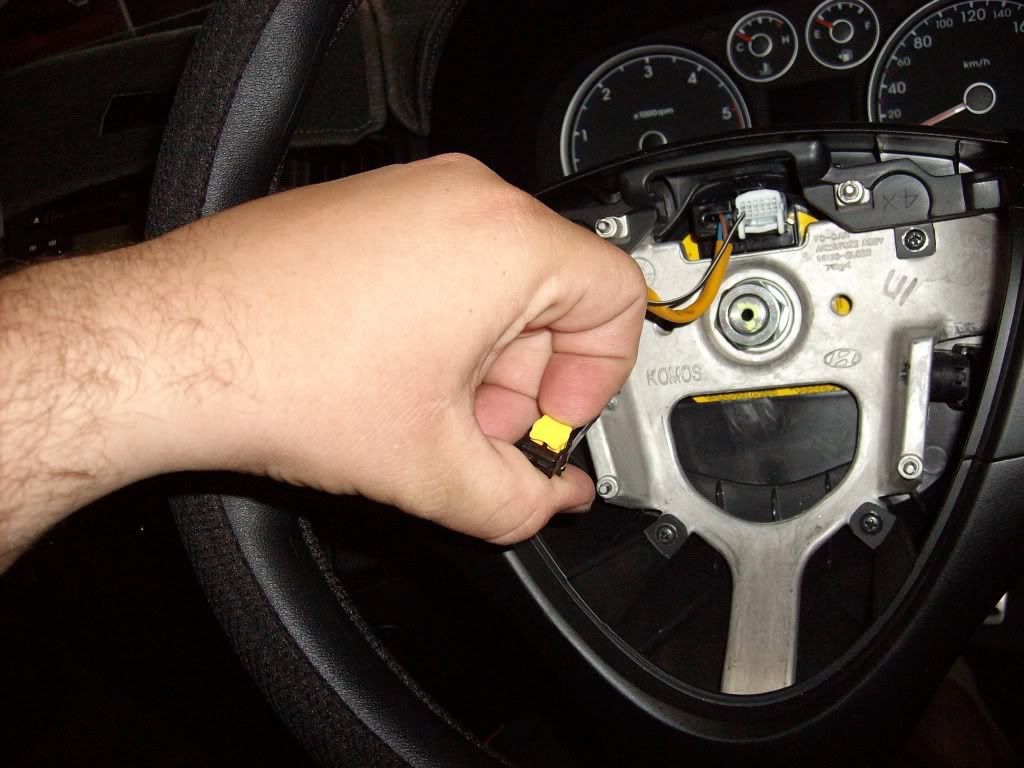
16 - disconnect the horn button wiring, disconnect the spade terminal on the air bag unit. put the air bag unit somewhere safe and out of harms way
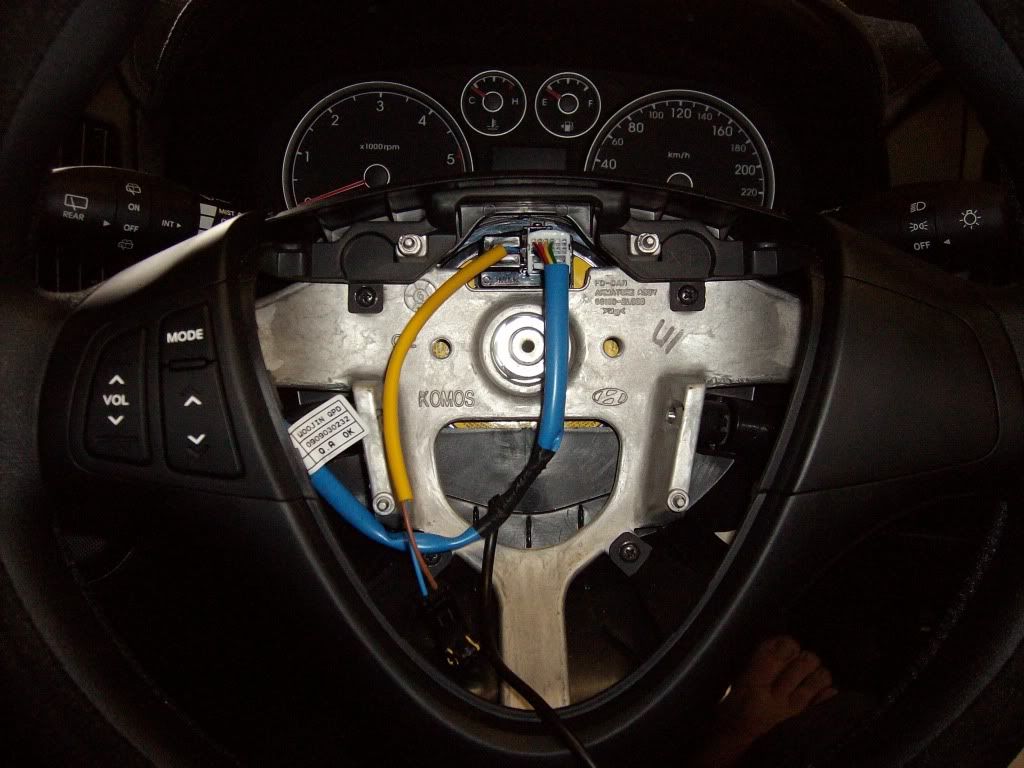
you will be left with a steering column that looks like this
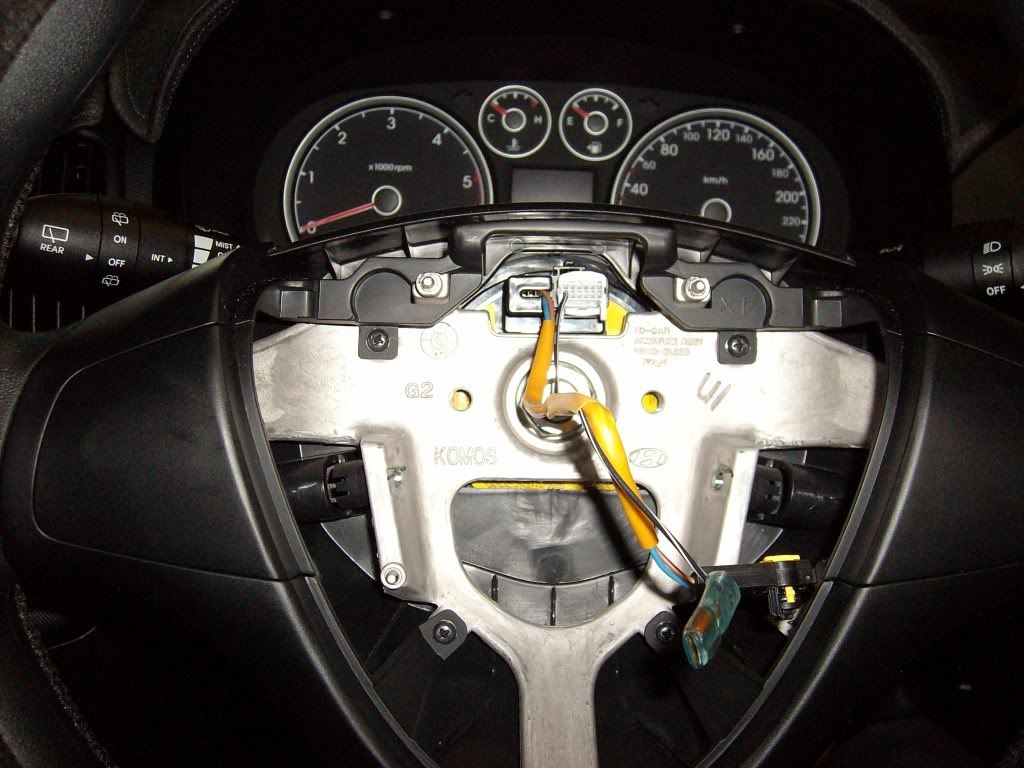
17 - remove the white connector from the clock spring and unwrap the yellow tape on the air bag loom, take the single black wire and connector out of the steering wheel, you wont be needing this part again, you can keep it or throw it out...
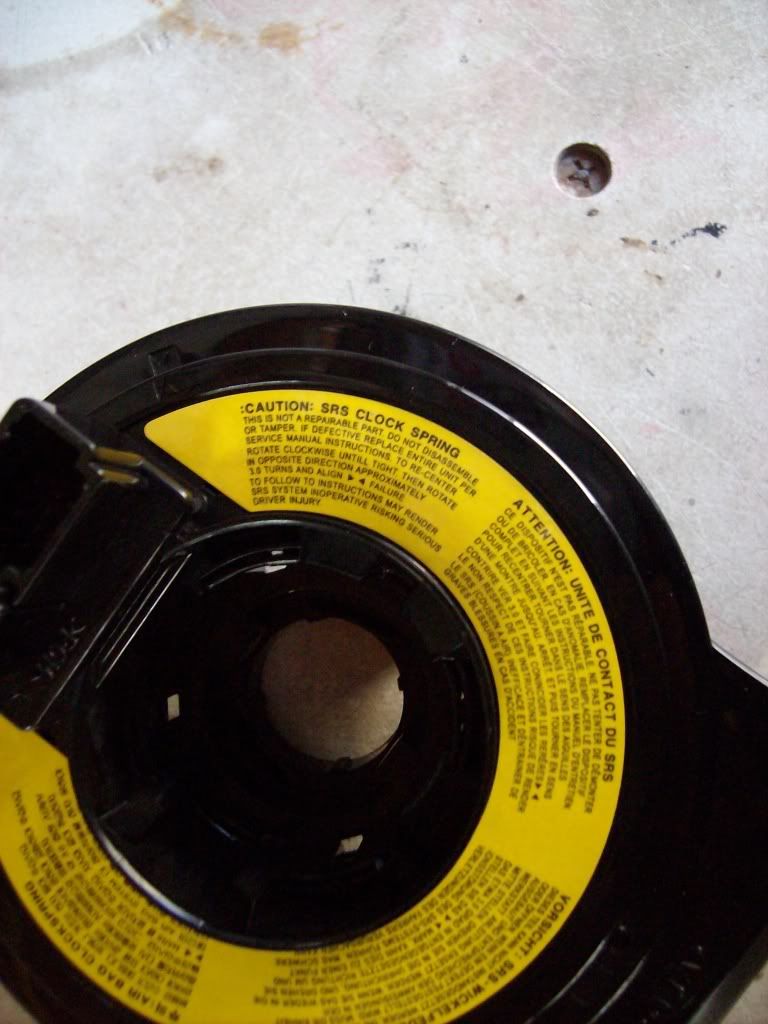
18 - do not move the clock spring, if you do then you're going to have to set it up again... the instructions are on the yellow sticker on it, it's not hard, but it's best if you dont move it so you dont have to set it up! keep the arrows that my fingers are pointing to together and you will have no problems, if you move it a little its ok just put it back, but if it moves and you lose position, its set up time buddy!
instructions for re-alignment
19 -pull the steering wheel off, use the 22mm socket, extension and breaker bar to undo the nut, DO NOT REMOVE THE NUT FULLY, leave it on 2~3 threads, bang the sides of the steering wheel (bit like king kong on his chest) and see if it comes off freely, the reason for this is if you remove it fully and pull the wheel and its stuck, your going to find your self with a face full of fail and possibly a broken nose from where the wheel smacks you in the head...
20 -you will be left with this, if you need to install the clock spring read the top section on how to remove the steering column shrouds... lets assume you have the right clock spring for now and install the switch
21 - with the steering wheel removed, take these 4 screws out and remove the rear plastic half of the steering wheel
22 - flip the wheel over, and pull the front section off by taking the 4 screws out, after you have the 4 screws out, there are 2 dowels on the bottom of the piece gently lift it out!
23 - now the plastic covers are off, start removing the blanking plate! lift the part where my thumb is over the little lug and push it to the side and down, down with the base of your thumb and to the side with the tip then the plate is off
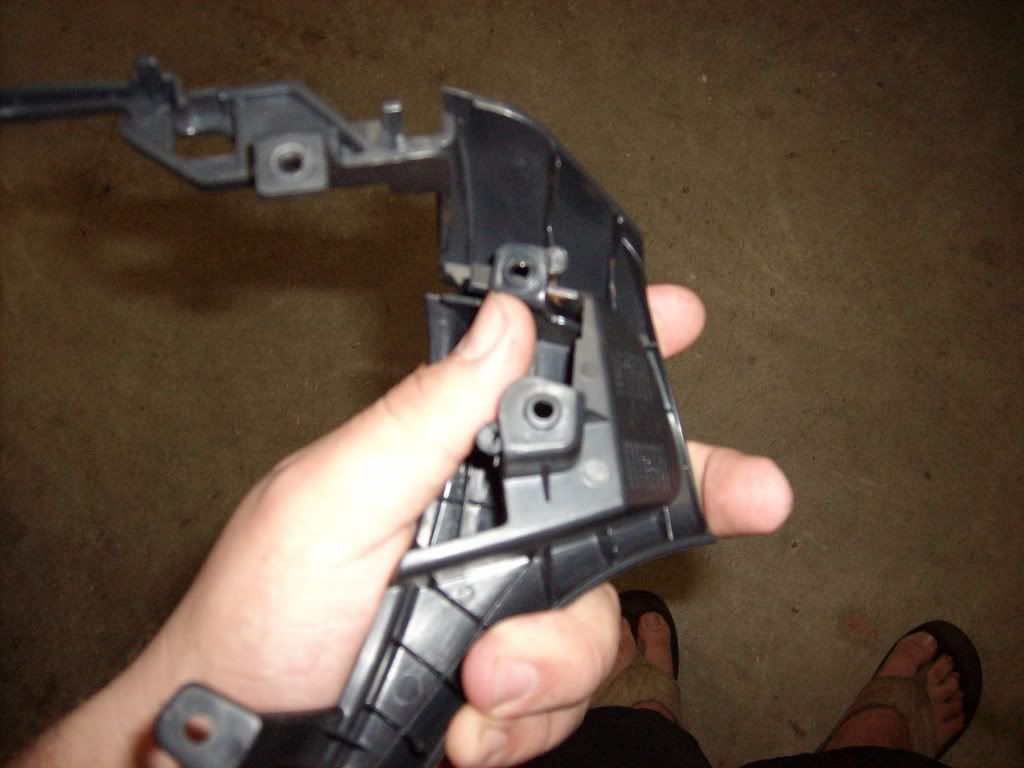
24 - install the switch, it goes in the same way the blanking plate comes out!
put the steering wheel back together, you can add the loom now, or do it when the wheel is installed, it makes no difference
if you need to replace the clock spring, this part is for you!!!
25 - strip down the steering column as i have shown you in the top part of this write up
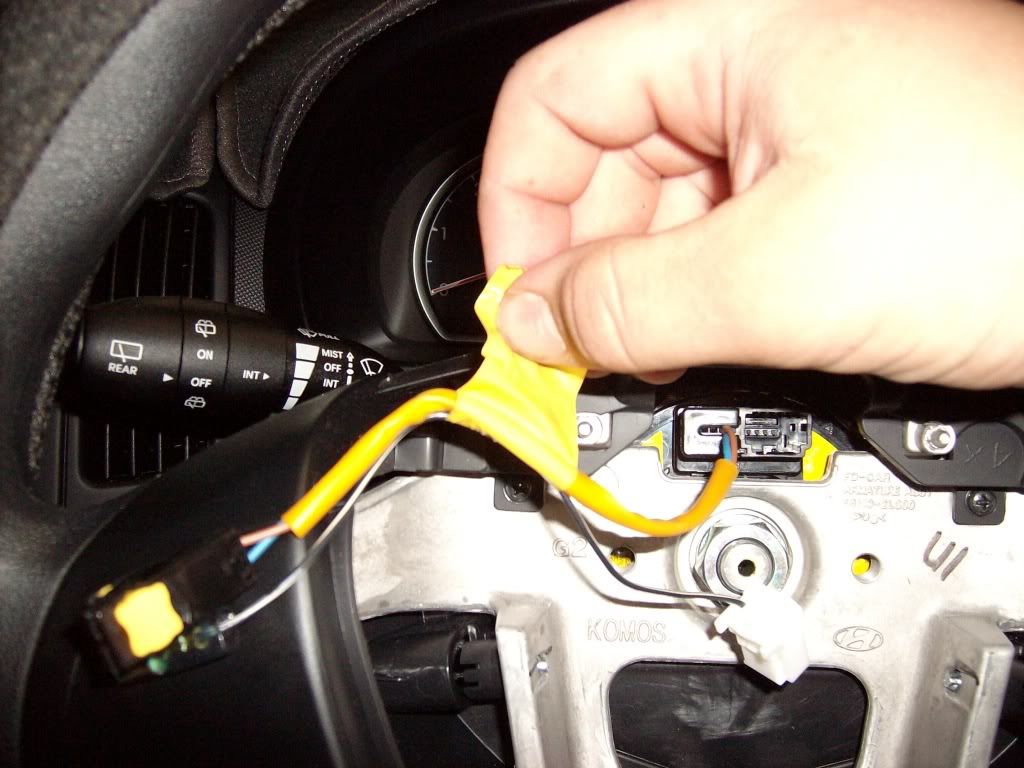
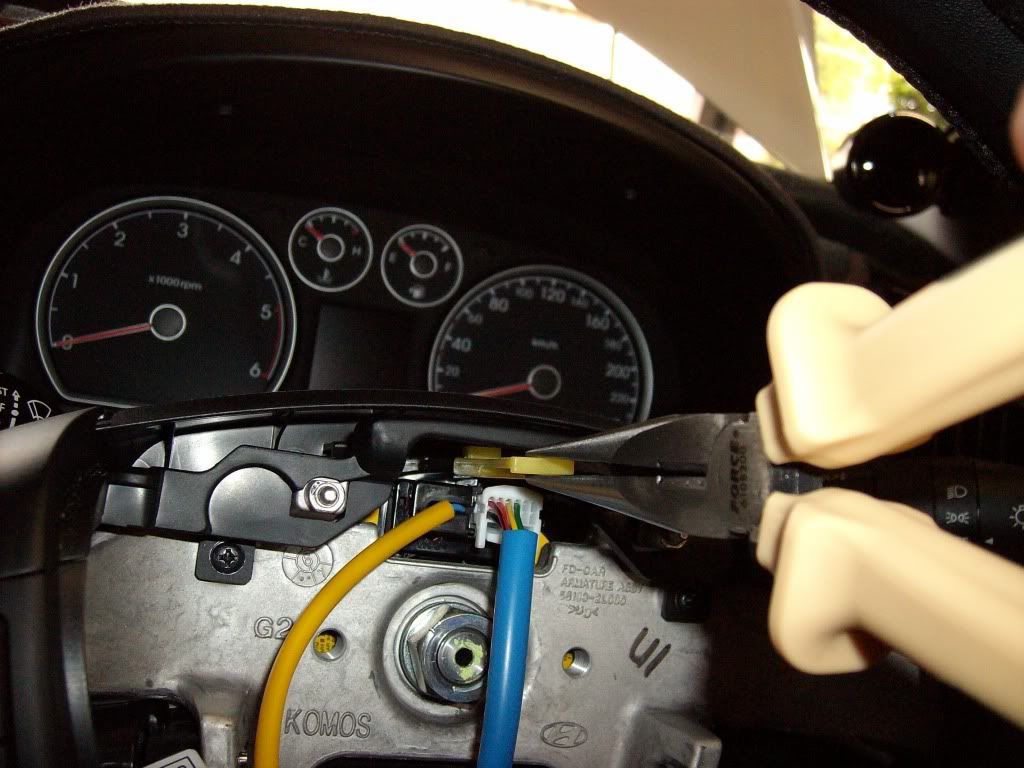
26 - remove the wiring to the clock spring, both connectors do the white one as described in the start and the yellow one like this
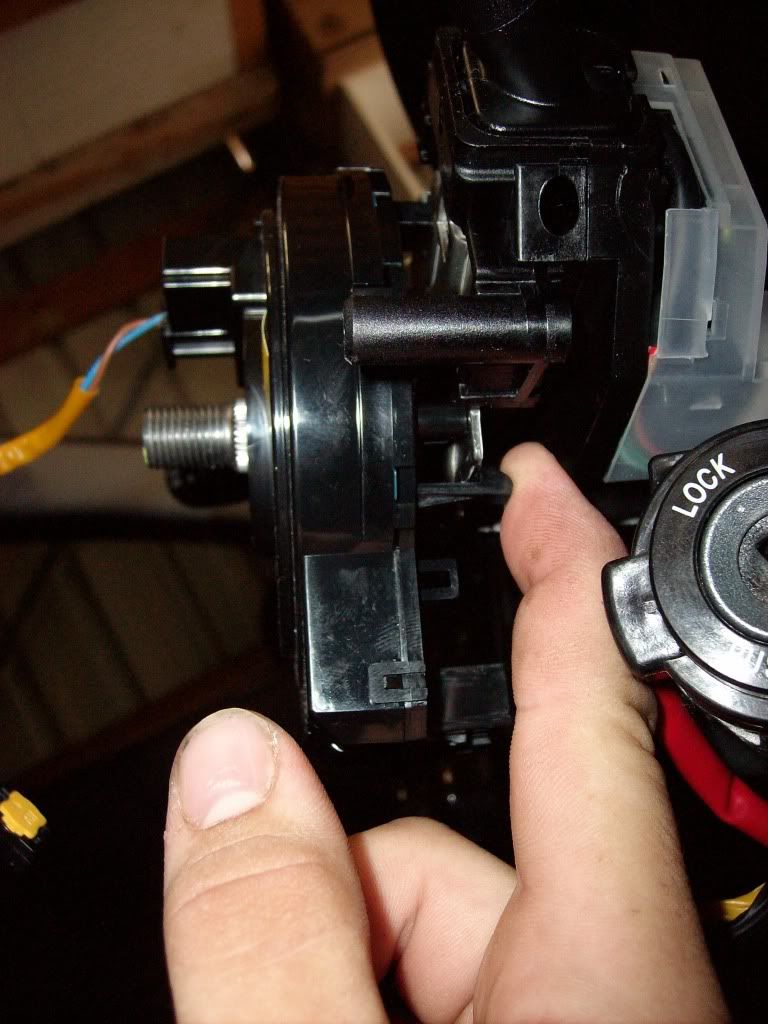
27 - with both connectors disconnected you can pull the clock spring off easy as, it just clips to the column
locate the bottom tabs and gently pull them back so they disengage with the column
28 - then the top clip
29 - and the clock spring is off!!!
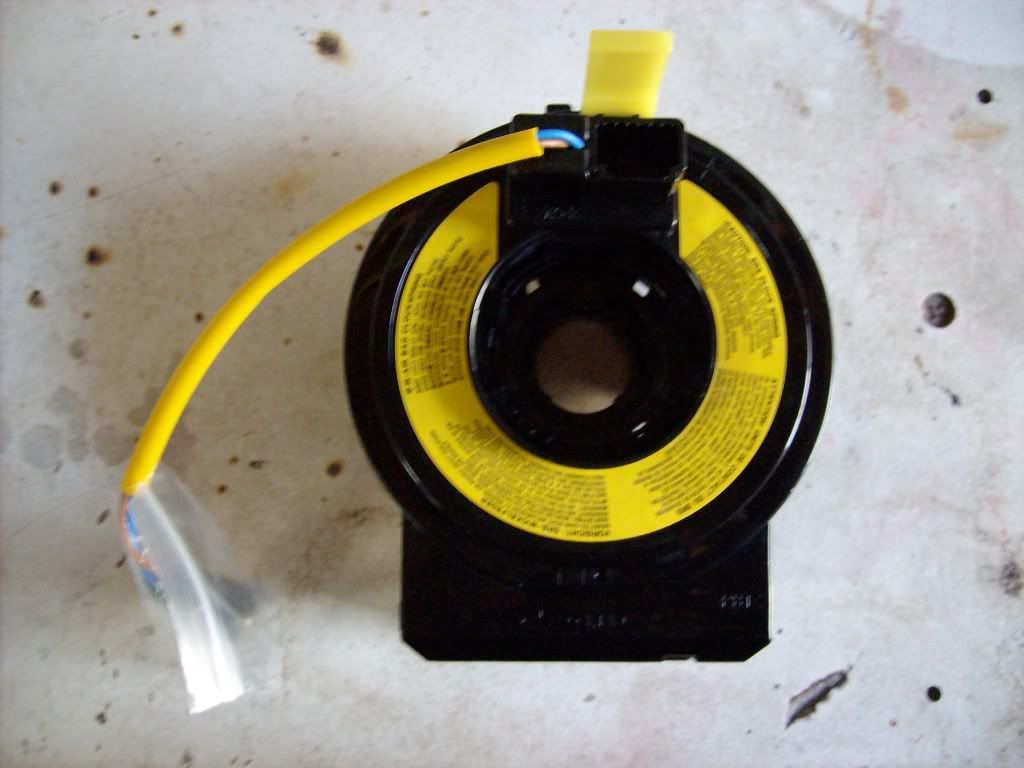
30 - the new one just clips in, locate the top clip then push the bottom ones on firmly, your new one will come with a yellow tab installed at the top, this is because they have pre wound it and it's ready to be installed... DO NOT WIND IT OR REMOVE THE TAB at this stage! leave it till last
note the yellow tab!!
31 - install the connectors on the steering column side, make sure everything is secure and not rubbing on anything, make sure the air bag connector is in properly!!
32 - re install the steering column shrouds now, so you dont have to go playing with the steering wheel moving it around just for 2 screws later on!!
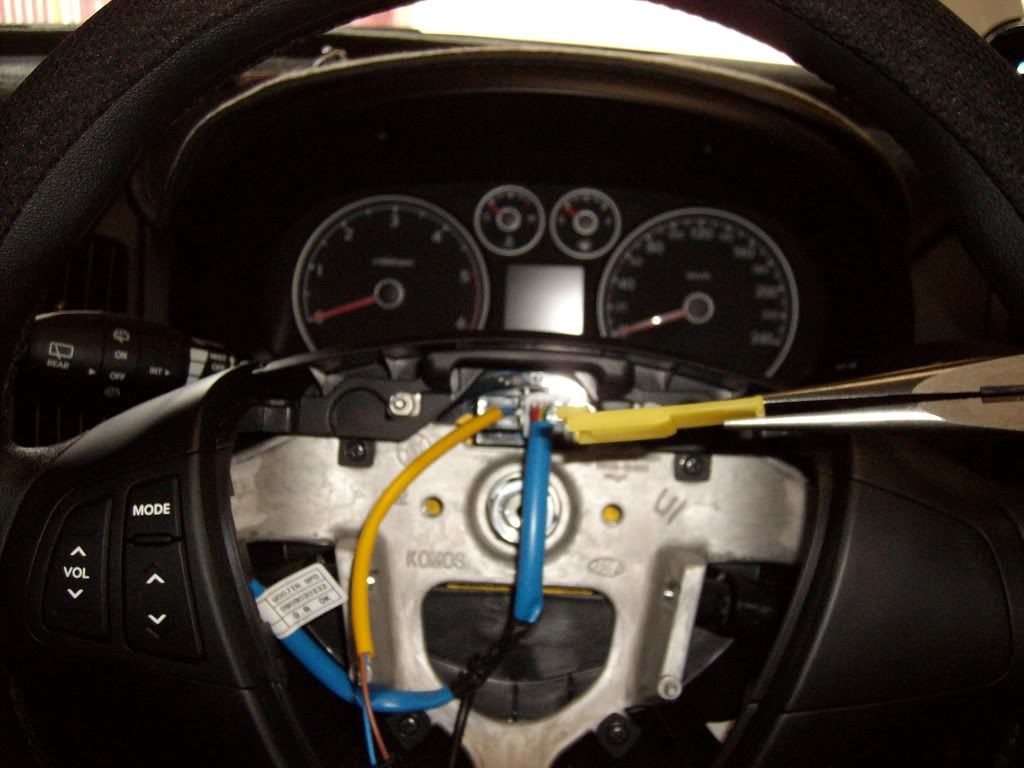
33 put the wheel back on, install the switch wiring it should look like this
34 - remove the yellow tab with the long nose pliers
35 - put it on the old clock spring to keep it secure and in its correct position!!!
36 - connect up the horn button, then the air bag connector, dont forget to "lock" the yellow tab back in so the connector cant fall out!!
37 - put everything back together its the reverse of the removal!!!
38 - time to connect the battery together, I like to turn the key on and let the car do its start up SRS/airbag test with me out of the car, check to see if the airbag light turns off as normal just in case anything happens dont be in the car...
40 - re- program your radio, consult the corresponding page of your owners manual for your stereo on how to do this!!
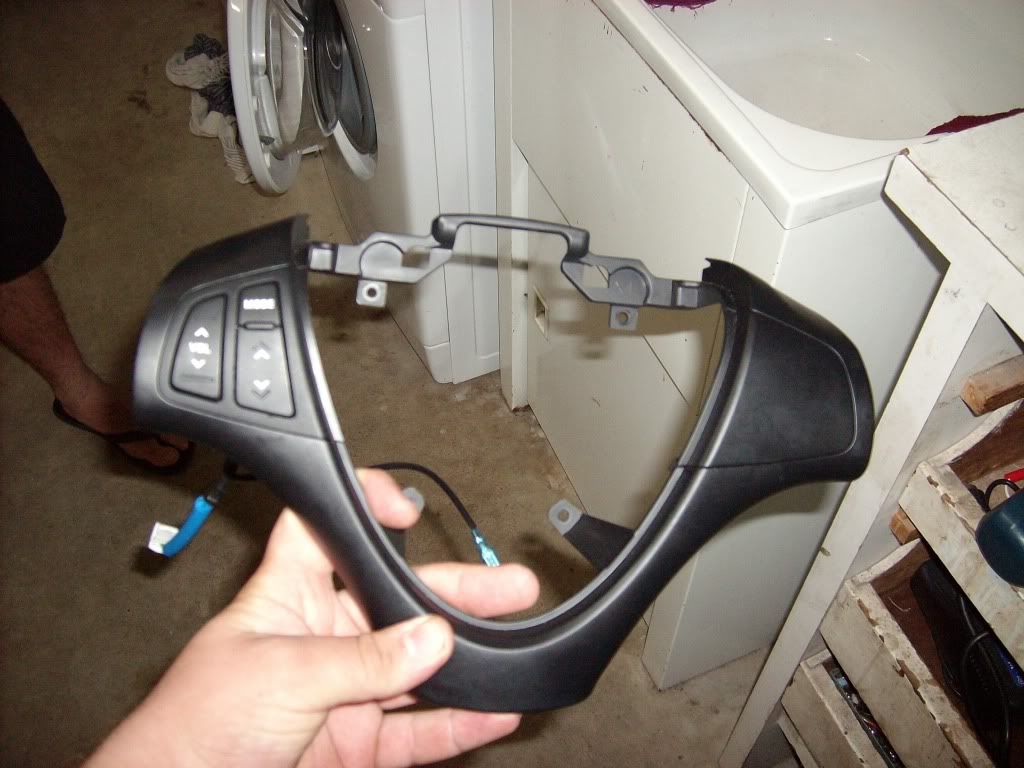
TAA DAAA!!!! *drum roll*
finished product!!!
this should only take you 30 mins if you have the correct clock spring, and probably 45 mins if you need to replace it! its really not a hard job and you dont need exotic tools for the job!
p.s thanks to pauly for the photos, those ones i forgot to take!!
